Figure 1
Figure 2
Figure 3
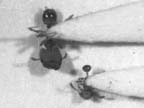
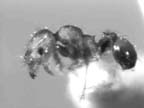
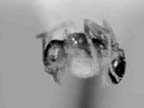
Place specimens in a dish of alcohol and examine under the dissecting scope. Select specimens of all castes in the collection (workers, queens, males). If there is worker size variation, or two distinct worker size classes (Fig. 1), select material from a range of sizes or of both worker castes (minor and major workers). Select specimens to mount that have the legs outstretched and the head and abdomen extended. If all specimens are curled up, attempt to extend the legs, head, and abdomen of a specimen while it is in alcohol. Specimens in 95% alcohol are stiffer and more brittle than specimens in 75% alcohol. Body parts tend to stay in place when you move them there, rather than springing back, but they are also more brittle and may break off.
|
|
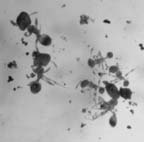
|
Figure 1 |
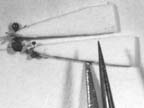
Figure 2 |
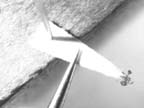
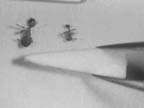
Figure 3 |
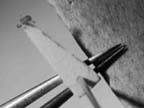
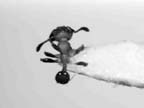
Place specimens on blotter paper to dry for a few minutes (less for small specimens, more for large specimens), until the integument does not appear wet. For alate queens and males (specimens with wings) float the specimens out on a small piece of paper, so that the wings lie flat on the paper. Put a 3x5 card under the scope, and place a microscope slide and some loose points on the card. Place specimens on the card, on their backs, with heads pointing down (Fig. 2). Again, attempt to spread legs by gently grasping opposite legs with two pairs of forceps and pulling them apart. Likewise attempt to extend head and abdomen. Maneuver points by grasping them at the sides with forceps (Fig. 2). Place a drop of glue on the slide, and put the glue, specimens, and point all within your field of view under the scope (Fig. 3). Touch the tip of the point to the glue, judging the quantity by the size of the specimen (Fig. 3). Attempt to place the tip of the point on the platform formed by the middle and hind coxae, inserting the point from the right, between the mid and hind legs (Fig. 4).
Figure 4 |
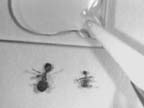
When the glue has dried sufficiently (may take several minutes for large specimens), slip the forceps under the point and pick it up (Fig. 5). Flip the point over and rest the base on a pinning block. Push a #3 insect pin into the base of the point so that the point is stuck to the tip of the pin (Fig. 6). You should then be able to release the forceps and pick up the point with the pin. With one hand rest the tips of the forceps sideways on the pinning block. With the other hand holding the insect pin, place the base of the point on the forceps (Fig. 7), and push the pin down through the forceps, to the height of the tallest step on the block. |
|
|
|
Figure 5 |
Figure 6 |
Figure 7 |
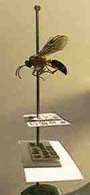
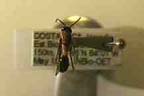
A well-mounted specimen is oriented as in Figures 8 and 9. The side of the mesonotum, the dorsal profile, and the dorsal and ventral margins of the petiole are clearly visible. The specimen should be more or less horizontal with respect to the pin (Fig. 10), and the entire unit of ant plus triangle should be centered over the label as in Figure 11 (the pin pierces the label near the right margin). Figure 12 shows a fairly well-mounted specimen, although tilted with respect to the pin. Figure 13 is a poorly-mounted specimen. The legs are projecting upward, obscuring the dorsal profile and the petiole, and the specimen is pushed too far back on the point.
|
|
|
Figure 8 |
Figure 9 |
Figure 10 |
|
|
|
Figure 11 |
Figure 12 |
Figure 13 |